RC Helicopter Training
Low Hover Exercises
by John Salt
Welcome to training day 4...
Your RC helicopter training goal today will be to learn how to hover and finally see some light under those skids.
As mentioned in the day 3 lesson , this day for most people is the most challenging and difficult.
It might take you several hours to several days to get past this important step – but if you follow the day 4 lesson plan and progress at your own speed – you will get it.
Some Important RC Helicopter Training Points To Mention Before You Start Today:
- Go over your helicopter after day 3 to make sure everything is functioning correctly, nothing has come loose, and radio, flight, receiver batteries are fully charged.
- You have a tame learning to hover setup (reduced pitch/throttle curve & dual rates).
- Ensure you RC helicopter training gear is attached and is in good shape.
- If you have a nitro bird, you have plenty of fuel or a few charged battery packs if you are learning on an electric RC helicopter.
- Perform the all important radio range check.
- The wind is calm or steady slight breeze – not gusty.
- Your flying location is free of obstacles and people (concentration will be maxed out today).
RC Helicopter Training Surface
During day 3's RC helicopter training session, it was important that you had a smooth surface like packed snow or pavement to slide around on for your ground hover exercises, that same kind of surface should be used for today.
You will still be sliding around and spending a good part of the time on the ground today. You will also be getting much lighter on the skids and actually hopping around - a smooth surface will make this easier as the heli bobs and is able to slide along the ground.
Just like yesterday you will need a fixed reference point as the exact same exercises will be performed today, but this time you will actually be in the air a few inches at first, and then a few feet while doing them.
Okay, let’s get started with day 4 RC helicopter training.
Determine wind direction and place your helicopter over the reference point with the sun behind you and if there is some light wind have the nose pointing into the wind with you standing about 10 feet behind your helicopter.
Start the helicopter and slowly increase the throttle to get the bird light on the skids. If you want to get a feel for the helicopter, you can perform a few ground hover exercises from day 3's RC helicopter training session.

Once you are comfortable and are over your reference point, increase the throttle/collective slowly while keeping the heli over the reference point with the nose always pointing into the wind. Keep increasing throttle/collective until the heli gets an inch or two off the ground.
Try to keep it over the reference point. It will try to run away on you, if you can’t regain control right away, cut back the throttle/collective so the heli is back on the ground. Increase the throttle and collective again and move it back over your reference point.
Common Beginner Panic Reaction Caution & Cure
 Tame panic attack pitch curves discussed.
I talk about this more in my Setup & Tips ebook pictured here that you may have already read, but it's worth repeating.
When beginners are first learning to hover a collective pitch RC helicopter, the natural tendency when you start to panic once airborne, is to quickly lower your collective/throttle stick.
I did when I was first learning, and most of students did it when I was instructing.
This is perfectly fine and a good reaction skill to have at this beginner stage; provided you have a very tame pitch curve that still produces a little bit of lift at low stick. Otherwise, you will auger your bird into the ground when you make this very natural low stick panic reaction.
I know you have likely already read this in the ebook; but it's worth repeating in case you missed it, or don't have the ebook. Having an ultra tame learning to hover pitch curve can save you many sets of rotor blades, landing skids, and tail booms. I also demo it and mention "tame pitch curve" several times in the training videos here on day 4, day 5, and 10.
The idea today is to get you heli so light on the skids, it is actually bouncing around a bit as you are getting more and more comfortable with the controls as it spends longer and longer times in the air.
You will feel like you have very limited if any control and the helicopter will want to drift away.
Remember my analogy of hovering a single rotor RC helicopter being like trying to balance on a big ball or moving a marble around on a serving tray...
You will be thinking this way too while learning to hover.
The most important RC helicopter training tip here is not to get much more than a few inches off the ground, and if the helicopter gets away from you, land, regain your composure, get the heli back over the reference point, and try again.
IMPORTANT - TAIL ROTOR THRUST!
The tail rotor will also be trying to push you in the direction of its thrust as I show and talk about in the above video and back on day 3.
To overcome this very normal tendency (properly referred to as Tail Rotor Translating Tendency), assuming your tail is pushing you left, you generally have to apply a little bit of right cyclic just as you leave the ground. Once in the air, you don't have to hold in any right cyclic since the bird can tilt slightly to the right once the skids leave the level ground surface (assuming the heli is trimmed out correctly of course).
With flybarless, you may not have to apply that little bit of right cyclic just as you lift off, but it really depends on the particular FBL system and the size of the helicopter (you may very well have to apply some).
The larger the heli, the less pronounced the left translating tendency because the mass of the bird in relation to tail rotor thrust is greater than on a smaller or micro heli where tail rotor translating tendencies are more exaggerated.
This just take some experimentation and getting used to for each heli you fly. I find myself applying a tiny amount of right cyclic with almost every CP heli I own when just lifting off the ground (flybar or flybarless really makes little difference).
This section of your RC helicopter training is usually the most difficult for most people – very much like learning to ride a bike. Keep at it, spending more and more time in the air after each little hop and staying over the reference point with the nose always pointing into the wind and you behind the helicopter. If you get tired or feel shaky – take a rest!
It may take you an hour or more flying time, but something will just click and all of a sudden you will be able to hold the helicopter over the reference spot several inches in the air for longer and longer periods of time.
Once you can hold it over that spot for a minute or longer guess what – you have done it! Your brain has just hard wired the required hand/eye/balancing control skills to hover a collective pitch RC helicopter. If you can hover at a few inches, you will be able to hover at a few feet or a few dozen feet.
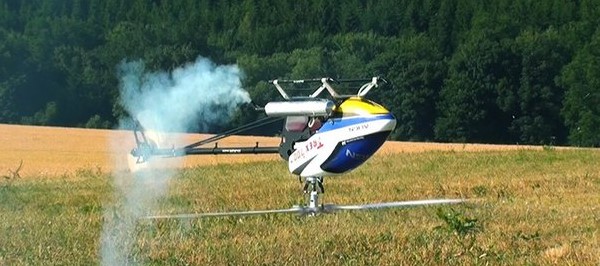
I should mention if you are flying a nitro RC helicopter, keep an eye on your fuel tank – it is amazing how quickly time flies when you are so focused.
You won’t be high enough to do any damage if the engine does run out of fuel and you have a tame pitch curve, but because the engine is likely set a bit rich, as it runs out of fuel, it will lean out first and start running very fast. This might cause you to panic and with this sudden increase in power it is possible to over control the helicopter and get it several feet in the air.
The engine then runs out of fuel and if you are more than three feet in the air, the helicopter will most likely be damaged as it comes down pretty hard.
For those with electric RC helis, this will not be a problem for you. As your battery pack runs out of power, your electronic speed controller will start limiting the voltage (to save the li-po battery) to the motor and you will slowly lose power. This however is not recommend since you should never run your LiPo pack down that low. I like to follow the 80% rule of never discharging a LiPo pack past 80% of its capacity - I talk about this on my LiPo battery page .
This is where the benefits of being able to refuel and get going right away make the learning curve on a nitro bird usually a bit quicker. That is why I suggested having several battery packs all charged up for your bird – you won’t have to wait around.
So you are now able to hold your RC helicopter in a nice solid hover over the reference point a few inches to a foot off the ground – what’s next? Well, seeing that you can hold the bird in one spot - it's time to start moving around in a controlled fashion.
Remember the forward, backward, left, right, and diagonal movements from the RC helicopter training ground hover exercises during day 3? It is now time to perform those same RC helicopter training exercises while flying a couple feet off the ground.
Start by hovering over your reference spot and slowly move the helicopter forward keeping the nose pointed into the wind and using very small control movements. If it feels like the helicopter is getting away from you and you start to panic, reduce the throttle/collective and land the helicopter.
Once you are comfortable with hovering forwards and backwards, now try left and right, always keeping the nose into the wind.

Got left and right down? Now try your diagonals away and back to the reference spot.

Depending on how big your helicopter is, you might notice it's actually easier to control when a couple feet in the air than when it was a few inches in the air. This is caused by ground effect and generally smaller RC helicopters are more susceptible to "dirty air" when close to the ground than the larger RC helicopters are.
Wow! What a huge day.
I can still remember this day from my own RC helicopter training experience all those years ago – I was on cloud nine. I'm sure you are experiencing that same natural high right now.
You have done it – you know how to hover a collective pitch RC helicopter without any self-level electronic help, and more importantly - control it.
Time to sit back and reflect on this day – you will likely never forget it for the rest of your life – Congratulations!
All set for day 5...
Day 5 is easy breezy compared to today.

As an Amazon Associate I earn from qualifying purchases.

Need Heli Help?
- Are you getting into the hobby and have no one to help you out?
- Are you feeling overwhelmed & confused?
- Are you tired of wasting time seeking partial and conflicting information?
- Is crashing due to not fully understanding helicopter setup turning you off the hobby?
- Are you simply ready to give up?
My RC Helicopter eBooks are here to help you with those exact problems.
Click Here For More Information

Click Here For More Information

Click Here For More Information
 Interested In RC Airplanes Too? Save Money With The Beginner's Combo Package
Recent Articles
-
OMPHobby RC Helicopters Let You Master The Skies
Apr 18, 24 07:21 PM
 Don't settle for anything less! OMPHobby RC Helicopters are built to last while taking your flying passion to a whole new level.
 -
Best Flybarless System In 2024 - Is There Such a Thing?
Apr 02, 24 09:08 PM
 Looking for the best flybarless system? Let's look at what's out there, pros & cons, features and pricing, to help you narrow your list.
 -
Learn How To Fly 3D Helicopter Aerobatics
Mar 15, 24 03:30 PM
 Want to learn how to fly 3D helicopter aerobatic maneuvers? Follow this skill building lesson plan to succeed.