RC Helicopter Lessons
Figure 8 hover pattern
Welcome To Training Day 5...
by John Salt
Today's RC Helicopter lessons will teach you how to fly a "tail in" figure 8 hover.
After day 4, today is very easy since it is just an easy progression from the last exercise that you did during day 4.
Once again, perform all your pre flight checks:
- All helicopter mechanics in good shape, nothing loose, everything working.
- RC helicopter training gear secured on the skids.
- Batteries Charged.
- Range check radio system, all radio switches in the correct positions (tame learning to hover setup flight mode).
- Calm day for flying, not gusty.
- Nice open area with no people or obstacles.
I will now recommend that you move to a field with soft grass if possible. You don’t require the hard surface to slide around on anymore since almost all your time from now on will be spent in the air.
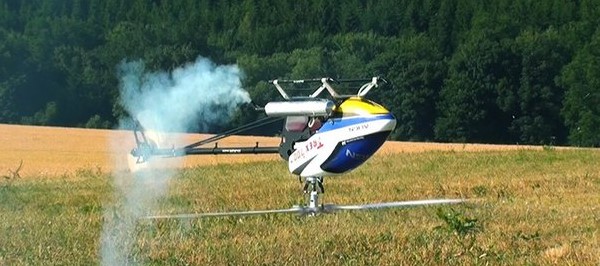
You will be flying several feet in the air today, and if you have to come down quickly or if the engine fails – some nice soft grass will cushion the impact.
You will still need a reference point however, so take something along that is heavy or that can be secured in the ground if the field doesn’t have any natural reference points.
Your RC helicopter training gear should still be on your helicopter even if you are very good at hovering by now. The training gear will protect your helicopter from tipping over should you have to land it very quickly.
The training gear is also a very good visual aid that will help you see pitching and rolling movements before you detect them on your RC helicopter.
You can actually stay a step ahead of the helicopter if you keep an eye on the training gear. Don’t focus on the training gear however – remember to always keep your eye on the nose or pod section of the helicopter at all times.
Tail In Hover Figure 8 RC Helicopter Lessons
Start up your helicopter and get it into a nice 2-3 foot hover above your reference point with the nose pointed into the wind and you standing 10-15 feet behind your heli.
Regain the feel for the controls by performing the forward/backward, left/right, and diagonal hover exercises from day 4.
Feeling good? Okay, now it is time for the hover figure 8 RC helicopter lesson.
With the helicopter hovering 2-3 feet over the reference point with the nose pointed into the wind, start moving at a diagonal angle forward and to the right.
Once the helicopter is about 6 feet away from the reference point start moving it only to the right and then on a backwards right diagonal, then backwards, then backwards left diagonal, then left and then forward left diagonal and then land.
That all sounds complicated, but if you trace that path out, you have just made a tail in circle (or hexagon) to the right side of your reference point and finished the circle back at the reference point.
The nose is always kept pointing forward into the wind and it should take you about 10-15 seconds to complete the circle. This is not a race – nice small control movements and a very smooth flying bird as it traces out the imaginary circle about 10-12 feet in diameter.

Now get back into a nice 2-3 foot hover and trace out a big 10-12 foot circle this time on the left side of your reference point and land when you get back to the reference spot.
Keep doing this, making the circles more and more perfect each time, perhaps even making them a little larger up to 15 feet in diameter. As you get more comfortable, don’t stop and land at the reference point, hook each circle together by continuously flying a figure 8 pattern in front of you with the nose of the heli always pointing forward into the wind.
Are you getting comfortable? Great – now fly the figure 8 in the opposite direction.
Start the figure 8 by moving backwards to the right and get comfortable flying in that direction. As you get more and more comfortable, make the loops of the figure 8 smaller and larger always staying in complete control making each figure 8 outline smooth and perfect.
The whole point of this figure 8 RC helicopter lesson is to get you comfortable hooking cyclic control commands together to keep the helicopter always moving, but staying in complete control the entire time.
This exercise also starts getting you comfortable with seeing your helicopter moving away from you and starts introducing changing perspectives or visual orientation of your helicopter. This is very necessary to prepare you for flying with the helicopter pointed in the direction of flight instead of always pointing forward.
Speaking of which – onto day 6.

As an Amazon Associate I earn from qualifying purchases.

Need Heli Help?
- Are you getting into the hobby and have no one to help you out?
- Are you feeling overwhelmed & confused?
- Are you tired of wasting time seeking partial and conflicting information?
- Is crashing due to not fully understanding helicopter setup turning you off the hobby?
- Are you simply ready to give up?
My RC Helicopter eBooks are here to help you with those exact problems.

Click Here For More Information

Click Here For More Information

Click Here For More Information
 Interested In RC Airplanes Too? Save Money With The Beginner's Combo Package
Recent Articles
-
OMPHobby RC Helicopters Let You Master The Skies
Apr 18, 24 07:21 PM
 Don't settle for anything less! OMPHobby RC Helicopters are built to last while taking your flying passion to a whole new level.
 -
Best Flybarless System In 2024 - Is There Such a Thing?
Apr 02, 24 09:08 PM
 Looking for the best flybarless system? Let's look at what's out there, pros & cons, features and pricing, to help you narrow your list.
 -
Learn How To Fly 3D Helicopter Aerobatics
Mar 15, 24 03:30 PM
 Want to learn how to fly 3D helicopter aerobatic maneuvers? Follow this skill building lesson plan to succeed.