How To Fly RC Helicopters
Day 1 - Pre Flight Instruction
by John Salt Last updated February 2026
Welcome To Day 1 of How To Fly RC Helicopters.
Here's what we'll be doing today:
- Reconfirm that you have the best RC helicopter to learn on.
- Make sure your helicopter is set up correctly for learning on.
- Make sure you understand how your radio control system works.
- Check and adjust the center of gravity (CG) of the helicopter.
- Start thinking about RC helicopter training gear.
- Know some basic RC helicopter safety.
- Have everything ready for Day 2.
Let’s get started!
How to Fly RC Helicopters - Best Size Heli to Learn On?
As
explained in the
best helicopter size
section. Most folks self learning collective pitch flying skills these days have really good success with 200 to 400 size RC helicopters. Small collective pitch helicopters in this size range are less intimidating and less dangerous.
Anything smaller can actually be harder to learn on due to having poor wind handling immunity along with having shorter flight times.
Small micro size helis can also be hard to see when you start flying circuits. Some people find even a 400 too small; but in general, a 400 size bird is a good compromise between stability, size, flight time, and cost with 300 and 200 size being close behind.
Nothing wrong with micros either however. As the saying goes, if you can fly a micro CP heli, you can fly any size. If budget is tight or you are unwilling to commit several hundred dollars into a hobby you are not quite sure about yet, a lower cost micro collective pitch helicopter is a good compromise! I have several recommendations on my Best RC Helicopter page.
Only you know for sure how much you want to invest at this early stage in your RC helicopter flying career.
How to Fly RC Helicopters - Setting Up Your Helicopter
As you know by now, I believe strongly if you get into collective pitch RC helicopters, the RC transmitter (radio) is every bit as important as the bird. More so in fact while learning how to fly RC helicopters so you can easily transform your collective pitch machine into a good trainer.
This is accomplished by reducing the collective & throttle range, cyclic pitch range, and tail rotor/yaw speed so the helicopter is less sensitive and doesn’t have the large control range that could get you into trouble quickly.
A tame learning to hover setup also prevents you from auguring your helicopter into the ground when you perform a "low stick panic attack". A very natural and common tendency almost all beginners do.

I have written an eBook that goes into great detail of what settings make this possible on any collective pitch RC helicopter, how to do it, and why.
How important is correct setup when learning how to fly RC helicopters?
Next to getting proper instruction, it's the single most important aspect of learning how to fly any collective pitch RC helicopter in my opinion.
So how is a RC heli trainer setup different from general flight,
sport, or 3D setups? Well, when you're first learning to hover, I find
people are most successful if they customize their pitch & throttle
curves to only the small portion of the curves where the bird hovers at
and of course have a small amount of lift control to gain altitude and
descend for gentle landings.
Why?
When only the hover portion of the curve is used (and a little bit on either side of the curve), the throttle and more importantly collective pitch stick resolution become much finer so the student doesn't over control lift and descent control of the bird.
Adjusting your cyclic and tail rotor response is also very important to tame cyclic and tail rotor control the same way as collective and throttle. Once again the whole idea is to produce finer stick control resolution. If some or all of these helicopter control terms are unfamiliar, I explain them in detail on the RC helicopter controls page.
There is no reason or want to have the full control range of performance a collective pitch helicopter is capable of producing when you are first learning to hover.
Think of it like learning to ski on a green run over a blue, black or double black for those skiers out there... Green = trainer, blue = general flight, black = sport flight, and double black = 3D.
The same way a steep mountain slope will cause a beginner skier to gain too much speed too quickly before he/she has learned the fine balancing & skills required to control that speed - an RC heli that is not setup correctly for learning on will quickly "overfly" the student's skill level. Again, all this setup stuff is covered in depth in my Setup & Tips eBook.
This "tamed down" learning approach by the way is not just my own personal training method; it falls right in line with MAAC's (Model Aeronautics Association of Canada) RC helicopter three-tier (BLADE) RC helicopter training program.
In fact, most of my flight school section is based heavily on MAAC's Blade program (Beginner, Intermediate, Advanced levels) for the simple reason it's how I learned and worked my way up to the Advanced Level & then became an instructor. I do however use my own 10 day training techniques to build the skills required for a student to pass MAAC's generalized A thru E proficiency tests.
NOTE. To pass any recognized RC helicopter training program that I know of, you can't use any form of self level or SAFE stabilization artificial help. That is after all cheating!
SO KEEP SELF LEVEL HELP TURNED OFF if your helicopter or flybarless system has it if you seriously want to learn how to fly a collective pitch RC helicopter and make the most of your training time. A properly tamed down heli fit with training gear will be almost as manageable, yet you will still be experiencing & learning the correct reactions while flying it. I cover this polarizing topic in detail on my RC heli auto-level pros & cons page.
What if I have a nitro powered heli?
True, most people these days learn on electric power but that doesn't mean you can't successfully learn on a nitro powered collective pitch RC helicopter. That is what we all used to learn on after all before the days of electric (me included).
That said, having prior nitro experience is a huge asset so you can break in and tune the engine properly.
Learning all the heli setup on top of nitro engine tuning pushes the learning curve to a near vertical level and it has been my experience that few can pull it off.
Most folks I've helped absolutely needed the one on one help an instructor offers if you have no prior nitro engine experience so he/she can get it all working properly before your first hover attempts.
Understanding Your Radio/Transmitter

If you are not fairly comfortable with your RC radio, now is the time to re-read the instructions that came with it and "play" with it a bit more.
Computerized radios are somewhat complicated
and it can take some time to get use to all the wonderful features they
sport and get everything programmed correctly.
Ensure all sticks move the control surfaces in the correct direction. For example - if you give a forward cyclic command, make sure your swashplate tilts forward and not backwards or side ways. Likewise for left and right cyclic when viewing the swashplate from behind the helicopter – left stick movement makes the swashplate tilt left and a right command tilts it to the right.
An increase in your throttle/collective stick should show an increase in both your collective pitch and in your engine/motor speed.
Confirming the tail rotor servo is moving in the correct direction is a little harder to understand at first. You must understand how the torque affects your RC heli to be able to figure out what direction the servo moves to change the tail rotor pitch. I cover this in detail on my tail rotor page and in the video below.
Checking Center Of Gravity (CG)
You most likely have already done this if you followed your helicopter building instructions, but now is a good time to recheck the center of gravity or "CG" for short. The CG is simply the balance point of the helicopter. You generally always want your CG at (or perhaps the very slightest bit forward) of the main rotor mast.
How do you check it? There are a few easy ways that work equally well for most RC helicopters.
The first method that works equally well for both flybar and flybarless requires you to hold the helicopter by the rotor blades at or close to the blade grips sideways to the ground. If the CG is nose heavy for example when holding the heli this way, the nose will slowly rotate downward; if it's tail heavy, the tail boom will rotate downward.
When the CG is perfect, the helicopter should just sit level and not rotate in either direction as seen below.
 CG Checking By Holding The Heli Sideways
The other method is to simply pick up your helicopter by the flybar (if so equipped) so the helicopter can pivot forward and backwards. If your helicopter is level, that's perfect. If it tilts backwards, that is the last thing you want when learning. Move your receiver battery pack or main flight battery a bit closer to the nose of the heli and recheck.
Here's another method that one of
my web visitors uses. He puts a round dowel or similar "fulcrum" under
the skids; and projects a line through the main mast down to the skids and puts a mark on the skids at that CG location.
If the heli balances on the dowel at that fulcrum point directly under the main mast, you know the GC
is on the money.
 CG Checking By Balancing The Skids On A Fulcrum In Line With The Mast
The fourth method I also use during the
build is to check the CG before mounting the rotor head by sliding a
screw driver or similar "rod" through the Jesus bolt hole in the top of
the rotor mast. This allows the heli to pivot forward or backward while
picking it up by this "rod" in the mast. If the CG is perfect, again the
helicopter should "hang" level. It's a nice way during the build just to see if things are close I find.
I should mention if you have a nitro, gas, or turbine RC heli, the CG will change a bit as the fuel level changes during the flight – this is discussed in nitro fuel tank section. It is generally common practice to check your CG if you have a fuel powered model with the fuel tank/s half full and adjust with the receiver battery pack placement as required.
Rotor Blade Grip Tightness
All RC helicopter rotor blades (main and tail) are held onto the blade grips with a single bolt and lock nut. The tightness (torque) of this bolt and nut are very important and I have seen many people (newbies and seasoned fliers alike) under or over tighten them - I was guilty of this for years myself.
There are several methods to check if you have your rotor blades tightened the correct amount and size of the heli is an important factor here. For 450 size heli's, this is the method I like the best.
For your main rotor blades, hold your helicopter sideways to the ground with the main rotor blades out straight from the blade holders, horizontal/perpendicular to the ground. The bolts should be tight enough so the blades don't pivot in the blade holders downwards by the pull of gravity but they should be loose enough to move if you give your bird a slight shake.
As RC helicopters get larger, you have to tighten the blade bolts more as the blades have much more mass. As an example, once over 750mm blade size (not rotor diameter), blade bolt torque is critical and on big blades like these, you generally have to tighten the bolts so tight, the blades won't budge when the heli is held sideways and shaken.
If large blades like this are too loose, they will lag during spool up and/or lead on spool down. Depending on both mass of the blade and the amount of lag/lead, it could shake your bird so badly, it could tip over while spooling up or down.
Adversely, micro size helicopters need to have very loose blades within the grip. They should flop down under the pull of gravity when held side ways because there is very little mass in tiny rotor blades and for them to lead and lag properly while in flight to keep the head in dynamic balance, they need to pivot very freely in the blade grips.
In short, Blade Bolt Torque is Directly Proportional to Blade Mass.
Tail rotor blade bolt adjustment is very much the same. They should be tightened just enough to prevent the tail rotor blades from pivoting down in the blade holder due to the pull of gravity on them. Because the mass of tail rotor blades, even on large RC helis is relatively low, the same method of testing tail blade bolt torque will work on most RC helicopters.
RC Helicopter Training Gear
I will just touch on this now; a more in depth discussion is given during the how to fly RC helicopter Day 3 lesson. You will need to purchase or build a set of training gear for your helicopter. Training gear will save your RC heli from tipping over when you are first learning to hover. Check out day 3 for more information.
Basic RC Helicopter Safety
As I have indicated several times in this web site, RC helicopters are potentially the most dangerous of all RC vehicles.
When you are first learning how to fly RC helicopters, specifically learning how to hover, the danger is not as great as it is when you are starting to fly around. After all, the heli will (hopefully) be staying close to the ground and be confined to a small area of the field.
The reason you want to think a bit about safety right now on day 1 is to determine where you will be going for your first hover attempts during days 3 and 4. The last thing you want is a location with lots people around. This is not only dangerous for them, but very distracting for you.
You should go out alone or with one person maximum to assist you. If you learn at a RC helicopter club, they should have a practice area away from the main flight line.
You will need maximum concentration – distractions are the worst!
This is not the time to have all your buds come out and watch your first baby steps. Also leave Fido at home – man have I heard some pretty messy horror stories about dogs going after RC helicopters. Almost happened to me once with an off leash dog, but that is another story.
You will need a nice large open area free of any obstacles. Clean dust free pavement or packed snow/ice are the best choices (more on this during Day 3).
When learning to hover, you won’t need as much room as when you start flying circuits, but you should have an area of at least 20m by 20m (60 feet by 60 feet) the bigger the better. Once you start flying circuits you will need much more room (unless you are practicing with a micro sized heli of course).
All Set For Day Two?
Well, time to wrap up day 1 pre-flight learning how to fly RC helicopters.
Make sure your radio, helicopter, and receiver batteries (if your bird uses a dedicated Rx pack) are fully charged for tomorrow.
Get your field box ready and have your power panel, glow plug driver, or starter batteries all charged up if you are learning on nitro.
A quick glance at the weather report doesn't hurt. Nothing worse than being all geared up, only to wake-up to gale force winds or rain.
Onto Day 2 – Your First Spool Up & Blade Tracking adjustments.


Need Heli Help?
- Getting into the hobby but have no one to help you?
- Are you feeling overwhelmed & confused?
- Are you tired of wasting time seeking partial and conflicting information?
- Don't understand the maze of RC heli setup fundamentals?
- Is that sickening feeling after crashing turning you off the hobby?
- Are you simply ready to give up?
My RC Helicopter eBooks will help you with those exact problems. Grab your copies today.
Click Here For More Information

Click Here For More Information

Click Here For More Information
Recent Articles
-
The Ultimate RC Helicopter Tools Guide: What You Need & Why
Apr 10, 26 12:56 PM
 A complete breakdown of RC helicopter tools. Let's cover swashplate levelers, pitch gauges, hex drivers and much more to help you achieve a pro-level build.
 -
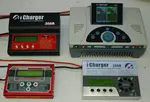
Best RC Battery Charger Guide: How to Choose the Right One
Apr 07, 26 02:29 PM
 Confused by Amps and Watts? Learn how to choose the best RC battery charger with this guide covering features, power, ratings, safety and much more.
 -
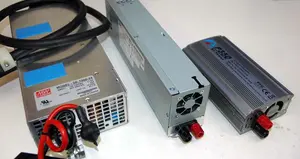
RC Power Supply Guide: Don't Starve Your RC Charger
Mar 31, 26 06:33 PM
 From low cost converted server power supplies to commercial grade options, let's find the best RC power supply for your specific RC battery charger.