Understanding The RC Helicopter Gyro
by John Salt - Updated September 2023

The RC helicopter gyro has made flying RC helicopters much easier, and has essentially made flying radio controlled helicopters feasibly accessible to most people who want to learn.
Let's demystify this little black (or yellow in this case) box :)
Why are tail gyros so important and why do you need one for your RC helicopter?
As we already discussed in the yaw control section of RC helicopter theory , the reactive torque produced by RC helicopters is always changing.
Any increase or decrease in engine speed or pitch of the main rotor blades results in a corresponding change in torque – sometimes a violent change.
These changes are happening constantly and are always trying to spin (or torque) the helicopter around. Wind and wind gusts are likewise playing havoc with your yaw control and if not adjusted for, will whip the tail of your helicopter around.
I have tried to fly a RC helicopter without a tail gyro and to say it is difficult is an understatement of magnitude. I really don’t know how people controlled RC helicopters before tail gyros came along?
You can try this yourself by turning the gain on your tail gyro way down or to zero percent. I don't know many people who can fly for long with no tail gyro correcting for all the torque induced changes.
On the other hand, most people (with larger RC helicopters anyways), can still fly with their cyclic gyros in their FBL systems turned down to zero. It won't be all that fun mind you, but it can be done by most experienced RC helicopter pilots without too much drama.
Speaking of FBL; RC helicopter tail gyro technology is what eventually made flybarless electronic stabilization feasible. When talking about RC heli gyros, generally we are talking about a single tail gyro to keep the helicopter from spinning around wildly (yawing).
Flybarless uses this same basic technology however. The only difference is it incorporates three gyros to detect and correct all three axis of heli movement (yaw, pitch, and roll). Click here to be taken to my full flybarless write-up if you are also interested in flybarless.
How Does An RC Helicopter Gyro Work
The RC helicopter gyro is a small device that detects any yaw (left or right swinging) movement of the helicopter and automatically sends a command to the tail rotor servo (or tail motor on small fixed pitch tail rotor helicopters) to correct and stop/limit the yaw movement.
When I started out in this hobby 30 years or so ago, the gyros that were available had a small electric brushed motor inside them that spun two heavy brass discs. Any change in yaw movement caused the motor assembly to pivot as the spinning discs resisted the change due to gyroscopic effect as I demonstrate in that video above.
 Mechancial RC Helicopter Gyro
The movement of the motor was picked up by a magnetic Hall effect sensor and converted into an electrical command to the tail rotor servo to limit the amount of yaw movement.
This type of gyro is now called a mechanical gyro and has gone the way of the dinosaur. That small motor spinning the heavy weights used up a considerable amount of battery power not to mention the added weight of these heavy brass discs.
RC helicopter gyros available today use Vibrating Structure Gyro Technology. As the name implies, a tiny (microscopic), small mass is vibrated very quickly electrically. The same way a spinning mass resists changes to movement, vibrating masses do as well. As they resist this change, the resistance force will change and can be electronically detected.
These changes in electrical characteristics of the gyro sensor are then processed by a micro-controller along with some fairly complicated PID algorithms, and converted to a servo friendly PWM signal to move the tail servo according (or cyclic servos in a flybarless gyro system).
There are two basic types of vibration structure gyros used in our hobby: inexpensive piezo crystal yaw detector or the better performing, MEMS (microelectromechanical systems) gyro sensors. Regardless of sensor type, these new "solid state" gyros use up much less battery power and are a fraction of the size & weight of the old style mechanical ones by an order of magnitude or more. With no heavy moving parts, the reliability and lifespan is a huge improvement over the older mechanical gyros as well - there is basically nothing to wear out!
Pictured below is an old style mechanical gyro in the background and a newer electronic piezo crystal detector in the foreground. Notice the huge size difference, not to mention the much improved performance of the newer electronic ones.

The gyro itself simply plugs into your rudder/tail rotor channel of your receiver and your tail rotor servo then plugs into the gyro. In short, the gyro is in full control of your tail rotor and interprets tail rotor commands from the receiver.
Only when the pilot sends a tail rotor command to the helicopter, will the gyro allow the helicopter to turn. How fast it turns depends on the amount of transmitter stick movement – at least for a heading hold gyro – our next topic.
Heading Hold vs. Yaw Rate Gyros
When you go RC helicopter gyro shopping (or at least when we used to go tail gyro shopping), you will be faced with two main choices – Heading Hold - HH (also called Heading Lock) or Yaw Rate (YR) gyros.
Think of a yaw rate gyro as a dampener – it dampens the amount of yaw movement to the RC helicopter from any source. These sources include torque variation as the main rotor speed, pitch, and cyclic are adjusted, a gust of wind blowing the tail around (weathervane effect), or by a command from the transmitter via the pilot. All older mechanical RC heli gyros were classified as yaw rate.
A yaw rate gyro doesn’t stop the heli from turning; it just dampens the amount of turning to a controllable level. Let’s say you are hovering and a strong crosswind picks up. Your helicopter will still start to turn to point into the wind, but not in a violent blink of the eye spin that would happen without the gyro. The movement will be dampened so much, it will be easy to correct - even for a novice pilot.
HEADING HOLD GYRO
The heading hold RC helicopter Gyro has changed so much about the way RC helicopters are flown. They not only dampen tail movement, they correct the heading too.
If you are getting into hobby grade single rotor RC helicopters, a heading hold/lock tail gyro or flybarless system tail gyro is pretty much the only option these days (most however will still allow you to run them in Rate Mode if you so choose).
RC Helicopter Gyro Gain Setting
This one has caused so much confusion over the years, not just in understanding what gain is, but how to adjust it and why it has to be adjusted.
In the simplest terms, the gyro gain setting is used to adjust how much correction output is given for the amount of error detected by the gyro.
If you have your RC helicopter gyro gain or sensitivity set high, the gyro will be very sensitive and send fast and large correction commands to the tail rotor (thrust changes) to correct for the smallest amounts of yaw detection. Likewise, the lower the gain or sensitivity setting, the less sensitive the gyro is and the slower and less amount of tail rotor thrust will be made when it detects yaw changes.
That is pretty straight forward, but now let’s look at the tail rotor of the helicopter, specifically the speed at which the tail rotor spins.
As the tail rotor rpm increases, so does the sensitivity and how quickly it responds. In other words, the sensitivity and response of the tail rotor in a hover at a lower main rotor RPM / tail rotor RPM will be less and slower than when the heli is at flying at full power with faster main and tail rotor speeds.
This is apparent if you have your gyro gain setting set at the highest value in a hover just before the tail wags or hunts. Then if you increase the engine speed (head speed), all of a sudden the tail will start wagging or hunting – a sure sign your gain is set too high.
In this application, you will have to set your gyro sensitivity/gain for the best compromise between lower and high rotor speeds unless your gyro has a selectable remote gain feature. Tail wag can also be caused by a tail rotor servo that is too slow and has to play catch up with the gyro.
With remote gain, you use a switched channel on your transmitter (usually channel 5) or pair it to your rudder dual rate or flight mode toggle if your radio has that programming option to switch between two or more gain/sensitivity settings. One set for more gain during lower rotor rpm and the other setting is for less gain/sensitivity during high speed rotor rpm. This way you will still have good RC helicopter gyro performance during a low RPM flying and can simply switch to less gain when flying more aggressively with higher head speeds.
When you are first learning, you don’t have to worry about this switching from hi to low gain settings since you will not be throwing your heli around and your rotor rpm will be very consistent. For scale flying, I never even worry about it either because I have a constant head speed.
Setting gain is fairly straight forward. As stated in the above discussion, gain is generally set to the highest value until the tail of the RC heli starts to wag or hunt. This is caused because the tail rotor is over-correcting for the amount of error detected by the gyro. If you have a single gain setting gyro, you must set the gain at the highest engine/head speed, in short use your highest idle up setting (near full power) when setting your gain during a hover.
The best way to test your gain setting is to get your heli in a hover and give a quick tail rotor command. If your gain is set too high, the tail will hunt (wag) before it stabilizes. Simply land and turn down your gain setting, either on the gyro or in the gyro programing screen on your RC radio. After you set your high speed gain, set the low speed gain setting at a lower head speed hover if you have a dual gain gyro.
As I mentioned in day 1 of how to fly RC helicopters , set your gain to about 50% since you will not have the skill yet to hover let alone hover at full throttle when the controls are super sensitive. This 50% is generally a good starting point for most gyro/heli combinations. The instructions for both the helicopter and gyro should have starting point recommendations as well – use them first and adjust if required.
Installing Your RC Helicopter Gyro
Installation of a RC helicopter Gyro is very simple in most cases but there are a few important points that I should mention.
Most gyros are mounted with two sided adhesive foam tape. This is supplied with the gyro and is very important not only to secure the gyro, but also allows it to function correctly. In the old days with mechanical RC helicopter gyros, foam tape was used to dampen vibrations that could damage the gyro itself.
This protection is required with the solid state piezo crystal & SMM gyros too, but there is another reason to use foam mounting tape. Piezos & SMM gyros are so good at sensing movement; they will actually pick up vibrations and can interpret them as small yaw movements resulting in unwanted corrections to the tail rotor.
It's very important you follow the mounting instructions that came with your gyro as to how much foam tape to use in order to eliminate erroneous gyro tail rotor commands.
 Typical RC Helicopter Gyro Mounting Position on Level Mounting Plate Using Supplied Double Sided Foam Tape.
If you are flying nitro RC helicopters, over time, this foam tape will usually get saturated with oil and the adhesion will fail. To keep this from happening, here's a tip I use.
After you stick the RC helicopter gyro on the mounting plate with the double sided foam tape, spread a thin film of silicone caulking around the base of the gyro and the mounting platform it is secured to. The thin film of caulk acts as a gasket to keep the oil from getting to the mounting tape.
Remember, a thin coat only. If you goop it on heavy, the vibration isolation qualities of the foam tape will be diminished. It would also be very difficult to remove the gyro when servicing your heli if it is glued down with silicone.
 Silicone sealant around gyro in nitro RC helicopter to protect foam tape from nitro oil.
If you have an electric RC heli, you of course don’t have to worry about nitro oil, but you do have to worry about the RC helicopter gyro's proximity to the electric motor or other strong magnetic fields.
Most manufacturers recommend the gyro has to be placed a minimum distance from the electric motor to avoid the strong magnetic fields produced by high power electric motors that would cause erroneous gyro operation.
This distance is usually about 5cm or more, but follow the instructions that come with your gyro when in doubt. Any good electric RC heli manufacturer knows this, and will have the gyro mounting plate set far enough away from the motor so it won't be an issue.
 Adequate space between motor and gyro.

Need Heli Help?
- Getting into the hobby but have no one to help you?
- Are you feeling overwhelmed & confused?
- Are you tired of wasting time seeking partial and conflicting information?
- Don't understand the maze of RC heli setup fundamentals?
- Is that sickening feeling after crashing turning you off the hobby?
- Are you simply ready to give up?
My RC Helicopter eBooks will help you with those exact problems. Grab your copies today.

Click Here For More Information

Click Here For More Information

Click Here For More Information
Recent Articles
-
The Ultimate RC Helicopter Tools Guide: What You Need & Why
Apr 10, 26 12:56 PM
 A complete breakdown of RC helicopter tools. Let's cover swashplate levelers, pitch gauges, hex drivers and much more to help you achieve a pro-level build.
 -
Best RC Battery Charger Guide: How to Choose the Right One
Apr 07, 26 02:29 PM
 Confused by Amps and Watts? Learn how to choose the best RC battery charger with this guide covering features, power, ratings, safety and much more.
 -
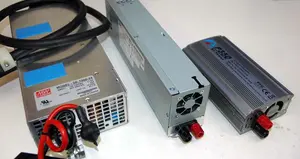
RC Power Supply Guide: Don't Starve Your RC Charger
Mar 31, 26 06:33 PM
 From low cost converted server power supplies to commercial grade options, let's find the best RC power supply for your specific RC battery charger.