Flying RC Helicopters
The Fast Figure 8 Circuit
by John Salt
Welcome To Training Day 9...
Yesterday you learned about flying RC helicopters in a fast large circle circuit around your fixed position. Today you will learn how to fly a large fast figure 8 circuit out in front of your position. This is actually very similar to the last lesson on day 6 – the long skinny figure 8.
You will be taking the fast forward flight skills you learned during day 8 and applying them to that slow and low skinny figure 8 to turn it into a large fast figure 8 circuit - the meat & potatoes circuit of circuits.
No point mentioning pre-flight checks right – you do them automatically now.
I still recommend you use your RC helicopter training gear during this lesson. They will help you with orientation as the helicopter flies fairly far away from you, and you will need them for day’s 10 lesson – the nose in hover, so you may as well leave them on.
Flying RC Helicopters Fast Figure 8 Instructional Video
Start up your RC heli and start flying that very simple (by now) long skinny figure 8 in front of you about 3-5 feet above the ground.
Slowly start making the figure 8 larger while increasing your altitude and forward speed. As you make your turns at the end of each figure 8 loop, start rounding them out and making them larger.
This is where the large fast circle circuits from day 7 come into play. You should now be very comfortable seeing the orientation of your helicopter making those large turns at the end of each figure 8.
If you start feeling a little shaky, slow down the helicopter and land. Regain your composure and try again.
Some people rush this day and end up crashing – if you don’t feel comfortable, practice day’s 6-8 again. It took me the better part of a month practicing before I started flying RC helicopters in this large figure 8 myself. If you have a simulator to practice on, that time will probably be cut down in half or better. Some people catch on fast others take more time.
Back to flying rc helicopters and our large figure 8. Keep increasing the size, altitude and speed of the circuit as you gain more and more confidence.
Don't forget about the effects of translational lift when turning up or down wind. When it feels right and your speed is high enough, start banking your turns at the end of each figure 8 loop.
Don’t forget to keep an eye on the timer or fuel level in the tank if you are practicing with a nitro. You will be having so much fun, time will fly.
Remember the same rule applies to this large figure 8 as it did for the small one during day 6. Always turn the helicopter with the nose away from you, never towards you.
Turn or bank left on the right side of the figure 8 and turn or bank right on the left side of the figure 8. This will ensure you don’t get disorientated. Once you learn the nose in hover during day 10, you can then start reversing the figure 8 or fly ovals with the nose of the helicopter turning towards you.
Some people never learn the nose in hover and are very happy with
this big meat & potatoes figure 8 circuit for years always turning the nose away as not
to get disorientated. That is totally okay, as long as you are having fun :-)
Pre Aerobatics
Surprise, let’s learn an easy aerobatic maneuver.
If you are 100% comfortable with this large fast figure 8, why not add a little pizazz and start working your way up to your first loop or 540 degree stall turn.
Instead of performing a banking turn at each end of the figure 8, how about trying a hammer head stall turn.
Before attempting this maneuver, make sure you have increased your cyclic pitch dual rate to at least 70% of full travel.
You might even want to turn your cyclic dual rates off and see how responsive your helicopter has become.
If you have fast reflexes and have mastered the large figure 8 circuit, you will have no problem adjusting to the quick controls.
This is fun and more importantly will introduce you to a very simple aerobatic maneuver that will plant the aerobatic bug in your head and completely addict you to flying RC helicopters.
When you are flying your large figure 8, instead of banking like you normally would, start pulling back on the cyclic to bring the nose of the helicopter up and as the helicopter starts slowing down, apply tail rotor to turn it 180 degrees to point it in the opposite direction (nose down in other words).
The idea is to pull back on cyclic so your helicopter will be traveling more or less straight up. As the momentum slows, add tail rotor to turn the heli 180 degrees so the nose is now pointing towards the ground. Let the helicopter gain speed and pull it out of the dive obviously before the ground interferes.
To make this not seem as scary at first, perform what is called a mild stall turn. Only point the nose up at about a 45 degree angle and add tail rotor as the heli slows down. The more you practice, the steeper the angle will become until you are getting very close to vertical.
Well now that you have had lots of fun, it is time for our last lesson – Day 10 the nose in hover. This is not fun for most people, but it is very necessary if you want to progress further than flying RC helicopters in the simple figure 8 circuit.


Need Heli Help?
- Getting into the hobby but have no one to help you?
- Are you feeling overwhelmed & confused?
- Are you tired of wasting time seeking partial and conflicting information?
- Don't understand the maze of RC heli setup fundamentals?
- Is that sickening feeling after crashing turning you off the hobby?
- Are you simply ready to give up?
My RC Helicopter eBooks will help you with those exact problems. Grab your copies today.

Click Here For More Information

Click Here For More Information

Click Here For More Information
Recent Articles
-
The Ultimate RC Helicopter Tools Guide: What You Need & Why
Apr 10, 26 12:56 PM
 A complete breakdown of RC helicopter tools. Let's cover swashplate levelers, pitch gauges, hex drivers and much more to help you achieve a pro-level build.
 -
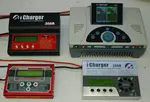
Best RC Battery Charger Guide: How to Choose the Right One
Apr 07, 26 02:29 PM
 Confused by Amps and Watts? Learn how to choose the best RC battery charger with this guide covering features, power, ratings, safety and much more.
 -
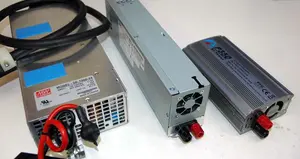
RC Power Supply Guide: Don't Starve Your RC Charger
Mar 31, 26 06:33 PM
 From low cost converted server power supplies to commercial grade options, let's find the best RC power supply for your specific RC battery charger.