RC Toy Helicopters
What To Look For & Recommendations
by John Salt - Updated February 2026

RC Toy Helicopters such as the Syma S107 have basically made it possible for anyone to enjoy flying RC Helicopters. They are not complicated or maintenance intensive, they are quite easy to fly, and most are very inexpensive.
True, they don't offer the same level and precision of flight control as an actual hobby grade micro RC helicopter will, but they also won't break the bank and are a great way to introduce your child (or even yourself) to RC flight :)
Disposable Toy Helicopters?
Yes, most toy RC helicopters are at best a short term device that will break or stop working within a week to several months (depending of course on how they are treated). Once that happens, most are destined for the trash bin.
If you don't particularly want to throw your money away, I recommend you take a peek at that best Helicopter for kids & beginners page which covers beginner hobby grade helicopters which can be fixed when something breaks on them.
Types of Toy Helicopters
Two Channel (2CH) Single Rotor Toy Helicopters
These were the first type of toy heli that were available for a low price. This basic single rotor design offers two channels of control - lift & yaw (turning).
 Single Rotor 2CH Toy Helicopter
They use a single main rotor and a conventional tail rotor to counteract the reactive torque.
The main rotor controls lift by speeding up and down, and the tail
rotor allows right and left turns by speeding up and slowing down.
Those are the two channels of control, speed of the main and tail rotors - very simple.
With a little bit of nose weight to shift the center of gravity forward of the main rotor mast, these very simple little 2 channel toy helis will slowly drift forward giving a rudimentary form of forward flight.
This type of toy helicopter has pretty much been phased out so you likely won't run into them that often anymore. They are however what first started the micro RC heli revolution back in 2004/2005, and are worth remembering for that reason alone.
Two Channel (2CH) Coaxial Toy Helicopters
 2CH Coaxial Toy Helicopter
The other 2 channel control method uses two counter or "contra" rotating rotors to supply both lift and yaw control.
This is known as the "coaxial design" (link takes you to my page on how they work).
Manual adjustment / weight shift is again used to change the center of gravity to allow a slow forward or backward drift with these basic 2 cannel ones. Not recommended however due to the limited & manual directional control they offer.
Three Channel (3CH) Coaxial Toy Helicopters
Without doubt, the most popular type of toy helicopter on the market right now are the 3 channel Coaxial Type (also called 3.5 channel by nonsensical marketing terms). The .5 is not a control channel at all, but rather a simple additional function provided by the true 3 channels of control.
The Syma S107 is pretty much the top selling one due to the almost give away prices ranging from $25 to $55 USD at most retailers, and they are also one of the best quality toy helicopters currently on the market.
Unlike most toy helicopters, you can also get replacement parts for them; so they could be considered true hobby grade in that respect.
For the price, the Syma S107G is hard to beat and the best value of the bunch in my opinion.

Just as with the 2CH coaxial toy RC helicopter, these toy versions use two counter rotating main rotors and by altering the speed of the rotors to one another, you can turn (yaw) the helicopter left and right (1st channel) as well as control lift (2nd channel).
The 3rd channel of control is used to control the speed and direction of a small tail rotor, but this tail rotor is mounted horizontally, not vertically like on most helicopters. It's normally called the "tail fan" in this configuration.
The way it works is if the little fan blows air down, the tail of the toy helicopter will pitch up slightly and the heli will drift forward slowly. If the tail fan direction is reversed and blows up, the tail will pitch down and the heli will slowly drift backwards.
It's somewhat slow and sluggish, but better than manually shifting the center of gravity as it most certainly provides controllable forward/backward movement.
4 Channel Toy Quad-Copters / Quad-Rotors / Drones
These can be slightly harder to fly, but generally offer the most fun in the toy segment. 4 Channels of control give you: lift, forward/backward (pitch), left/right (roll), and the ability to yaw (turn). Some can even perform flips and rolls at the push of a button.
I have a section on quadrotor RC helicopters if you wish to learn more about how they work.

No question, the toy quadcopter market is overly saturated these days with product. Provided the reviews are good and the one/s you are looking at and considering purchasing state they use 2.4 GHz radio frequency (not infrared control) you should have no problem finding a decent one. The fact is they are all very similar regardless of the marketing. The ATOYX / Holly Stone Mini however is one I quite like for beginners.
This attractive little quadcopter is a child and adult favorite alike and for only $30.00 USD, the value can't be beat. The propellers are not fully exposed, instead being encircled by a protective shroud ducted fan style.
This is both safer for your youngster/s and pets, not to mention your walls and other valuables that could be damaged by exposed spinning propellers.
The advanced electronic stabilization system makes it easy for beginners to pilot with features such as self level, auto orientation correction, emergency stop & low battery warning; while also having the ability to do flips and rolls at the push of a button as your skills get better.
Final Toy Helicopter Thoughts
Toy grade RC helicopters & quadcopters / drones are introducing so many kids and adults alike (total beginners) to the wonderful world of RC flight in a very inexpensive manner.
Many people who are first introduced to the hobby with one of these simple, generally impulse buy toy helicopters, are often bitten by the RC helicopter bug. Then progressing into better quality hobby grade radio controlled helicopters.
Incidentally, my first toy helicopter was a Mattel VertiBird way back in the 70's, and although it wasn't RC, it had a profound impact on my interest in helicopters & aviation that continues to this day.
For this reason alone, toy helicopters offer massive value to our hobby and beyond; introducing children to engineering and science. Yes they are both fun & educational.


Need Heli Help?
- Getting into the hobby but have no one to help you?
- Are you feeling overwhelmed & confused?
- Are you tired of wasting time seeking partial and conflicting information?
- Don't understand the maze of RC heli setup fundamentals?
- Is that sickening feeling after crashing turning you off the hobby?
- Are you simply ready to give up?
My RC Helicopter eBooks will help you with those exact problems. Grab your copies today.

Click Here For More Information

Click Here For More Information

Click Here For More Information
Recent Articles
-
The Ultimate RC Helicopter Tools Guide: What You Need & Why
Apr 10, 26 12:56 PM
 A complete breakdown of RC helicopter tools. Let's cover swashplate levelers, pitch gauges, hex drivers and much more to help you achieve a pro-level build.
 -
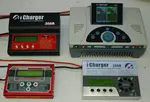
Best RC Battery Charger Guide: How to Choose the Right One
Apr 07, 26 02:29 PM
 Confused by Amps and Watts? Learn how to choose the best RC battery charger with this guide covering features, power, ratings, safety and much more.
 -
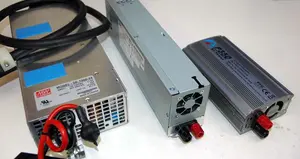
RC Power Supply Guide: Don't Starve Your RC Charger
Mar 31, 26 06:33 PM
 From low cost converted server power supplies to commercial grade options, let's find the best RC power supply for your specific RC battery charger.