RC Helicopter Autorotation Explained
by John Salt

Autorotation (auto for short) is the method full size helicopters use to glide down safely and under control when there is a loss of power.
Most collective pitch RC helicopters can also "auto" so if the engine flames out or the motor quits for some reason, you will be able to save your bird.
OK – I hear some people saying helicopters can’t glide, they drop like a stone if the engine quits – that is true if you don’t have auto capability on your collective pitch RC helicopter, but if you do, you can glide your RC heli in for a perfect landing as seen in the simulation below.
So how does something without wings glide you ask? Our helicopter does have wings – they are called rotor blades. Rotor blades are simply rotating wings, and as long as they are rotating fast enough, they provide lift. The question is how to keep them rotating fast if there is no engine power?
You need two things to achieve this...
1. Autorotation Requires Collective Pitch
First - do you remember me talking about the other benefits of Collective Pitch in the Fixed Pitch or Collective Pitch section?
Well, here is one of those benefits.
Yes you need collective pitch control for autorotation to work. This is what allows you to keep the rotor blades spinning fast.
How?
When your engine quits, you immediately change the pitch angle of the main rotor blades from positive pitch to slightly negative pitch (assuming you are not inverted, when inverted, you do the opposite).
By doing this, the rotor blades will continue to keep spinning in a forward direction as the air rushes by them while the helicopter is descending.
The whole idea behind this is to maintain rotor speed/energy as the heli descends and then as the helicopter nears the ground you change the collective pitch angle of the rotor blades back to positive. The kinetic energy built up in the rotor disc allows you enough power to stop your descent and make a soft landing.
This is actually quite tricky but once you do a few autorotaions, it can get pretty fun.
Having the right amount of negative pitch and positive pitch is very important; generally at least -3 degrees up to +12 degrees but it depends on your helicopter. Larger birds auto better than small ones because there is lots of blade area and rotor mass.
Auto rotations work much better if you have some forward speed providing "clean" air (also referred to as translational lift ) preventing the heli from descending too quickly while still maintaining ample amounts of energy in the rotor. This is generally referred to as "glide path" or "glide slope" and a forward glide path of about 45 degrees provides a good slow descent rate at around -3 degrees collective while maintaining ample amounts of rotor energy.
The key to a successful autorotation is all in the timing and knowing when to slow your descent and forward speed by flaring with a rear cyclic command, applying positive collective pitch, and then leveling out the heli just before touch down with forward cyclic to land gently. All that without dissipating all the energy in the rotor before you land. Remember, you only get one shot at this. Boom strikes are common if you over-flare and lose most of your rotor energy before touching down.
One thing that helps with this is first practicing on on a smoother surface and take off your skid grips if so equipped.
This way, you can still come in with a little forward speed if you don't flare enough and "slide" out the landing. Sliding out an autorotation is far better than boom striking.
If you try sliding it out on a thick heavy lawn, the skids will jam into the grass and you'll tip forward or even over onto your side. No shame fitting your training gear back on either for a little added confidence. Coming in dead level and sliding out again is better than over flaring, losing most of your rotor energy, and then boom striking.
Performing an autorotation into a slight head wind is also much easier than trying it downwind so take that into consideration when setting up your approach. You generally want to be about 50 to 75 feet or so high when you hit your throttle hold. This gives time for a bail out if required; but more importantly it gives you enough altitude and time to glide in while maintaining rotor energy.
The glide in phase of the autorotation should have the very slightest amount of nose down attitude to maintain that 45 degree glide slope. When setting up the approach, you want to pick a spot to start the auto about 45 degrees in front of the spot you intend on touching down.
In other words, if your heli is
about 50 feet high, you should start the auto about 50 feet away from
the spot you want to land. Remember, your glide path is going to be
about 45 degrees so if you hit throttle hold as the heli is passing
overhead right in front of you at 50 or so feet, it's going to be about 50 feet distance away from you when it touches down.
To perform a soft and safe autorotation landing, you need to see what the bird is doing to make sure it's nice and level, your flare is good, and you time your collective right for a soft touch down. That can be pretty difficult if it's 50 feet away from you.
The goal is to set it down in front of you just as if you were doing a normal powered up spot landing. When was the last time you landed your your helicopter 50 feet away from where you were standing? I'm guessing never...
Blade grip tightness is pretty important as well. If the blades are too loose in the grips, they will lag excessively with all that positive collective pitch drag and rapidly decaying head speed during the landing. I talk about "blade grip torque" in my flight school section (day 1).
This is heli size dependent of course, but the blades should be at least tight enough in the grips that they don't pivot downwards when the bird is held on edge and given a light shake. Blade mass also plays a roll. Most stock blades are fine but do stay away from super light rotor blades (such as hollow or unweighted foam core ones).
Practice makes perfect and this is where your trusty Flight Simulator can help with the dynamics of what all is going on.
If you had fixed pitch or kept the rotor blades at a positive pitch angle, they would soon stall and stop rotating. Yup - the helicopter has now become an expensive rock. This is why autorotations rely on collective pitch.
2. Autorotation Requires One Way Drive Bearing/s
The second thing your helicopter needs to perform autorotations is a way to disconnect the main rotor shaft from the rest of the drive or gear assembly (the engine/motor and in some cases, the tail rotor).
If the rotor shaft stayed connected to these other drive devices, it wouldn’t keep spinning. Plus you don’t need the tail rotor spinning during an auto rotation since there is no more torque being developed with no power going to the main rotors.
That said, most aerobatic RC helicopters do keep the tail rotor spinning for yaw control during the auto. Keep in mind however, the more tail input you give, the more power you are robbing from the rotor disc so keep tail inputs small when first practicing.
We don’t actually physically disconnect the rotor shaft from the rest of the drive components - but we do allow it to spin freely, by using one way bearings on the rotor shaft.
This is the same idea as a bicycle’s rear wheel. While you are pedaling, there is power going to the rear wheel - but when you stop pedaling, the rear wheel is free to spin. If this wasn’t the case, the pedals would keep rotating and you couldn’t coast (track bikes for example).
This is exactly the same principle that is used in an RC helicopter with autorotation capability.
As long as the engine/motor is supplying power, the energy is transmitted to the main rotor shaft through the locked one-way bearing/s. If the engine/motor quits, the bearing/s now rotate and the rotor shaft is allowed to spin freely – just like coasting on your bicycle.
The sound of an "Auto" is collective pitch music!
With no engine noise, the only thing you can hear is the rotor slicing through the air. Hearing how the noise changes as the blades are changed from negative to positive pitch just before touch down is very cool to experience and is why the auto has become a crowd favorite and is so popular in RC Heli competition events.
Here's a pretty neat video of a full size Bell UH-1 performing an auto rotation. Note the amount of flare required to dissipate forward speed.


Need Heli Help?
- Getting into the hobby but have no one to help you?
- Are you feeling overwhelmed & confused?
- Are you tired of wasting time seeking partial and conflicting information?
- Don't understand the maze of RC heli setup fundamentals?
- Is that sickening feeling after crashing turning you off the hobby?
- Are you simply ready to give up?
My RC Helicopter eBooks will help you with those exact problems. Grab your copies today.

Click Here For More Information

Click Here For More Information

Click Here For More Information
Recent Articles
-
The Ultimate RC Helicopter Tools Guide: What You Need & Why
Apr 10, 26 12:56 PM
 A complete breakdown of RC helicopter tools. Let's cover swashplate levelers, pitch gauges, hex drivers and much more to help you achieve a pro-level build.
 -
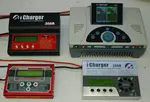
Best RC Battery Charger Guide: How to Choose the Right One
Apr 07, 26 02:29 PM
 Confused by Amps and Watts? Learn how to choose the best RC battery charger with this guide covering features, power, ratings, safety and much more.
 -
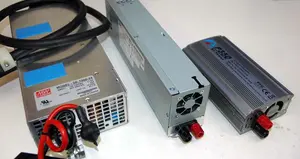
RC Power Supply Guide: Don't Starve Your RC Charger
Mar 31, 26 06:33 PM
 From low cost converted server power supplies to commercial grade options, let's find the best RC power supply for your specific RC battery charger.